

How they differ from internal agents
Create a customer-facing agent
1
Open Agents
Go to Agents in the workspace sidebar.
2
Add a customer agent
Select Add agent > Create customer agent. Conduit also creates an inbox for the agent, so inbound conversations for that contact type can be routed to it.
3
Configure it
Fill in the Persona, Tools, Skills and Settings tabs. See Agents for what each tab holds.
Inbox triggers
A customer-facing agent runs when a message arrives in an inbox it’s attached to. The agent’s sidebar lists them under Inbox triggers, and warns you when another agent already listens to the same inbox. Messages in the Unmapped inbox don’t trigger agents. If an agent is attached to Unmapped, Conduit flags it so you can remove the trigger or route those messages to another inbox. See Triggers.Autopilot, Copilot and Inactive
Set how the agent responds from the Agent behavior menu in its top bar. Pick a mode, then select Save.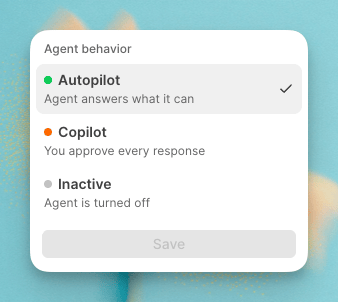
Most teams start in Copilot, review proposed replies until they trust the agent, then switch to Autopilot. See Road to autopilot.
Settings that only customer-facing agents have
Because they reply to contacts, customer-facing agents have extra sections on the Settings tab:- Escalation rules: what happens when the agent escalates a message.
- Behavior: language, voice, working hours, reply delay, auto mark-as-done and signature.
Test and review
- Before going live, use Sandbox to simulate conversations with realistic contacts and reservations. See Testing agents.
- After publishing, open the Activity tab. It lists one row per run with its status, contact, start time and disposition, and lets you open the trace to see the instructions, Knowledge and tools the agent used.