

Before you start
- Set a charge on your tasks. See Set what a task pays
- Save a company payment method. See Company payment settings
- Have each worker connect Stripe. See Workers: connect Stripe to get paid
Set what a task pays
Set a Charge rate on a task, a template or an automation. You can also set a different rate for one property on its template settings.- Per piece: a flat amount for the task
- Per hour: the rate times the time worked on the task
How a payment works
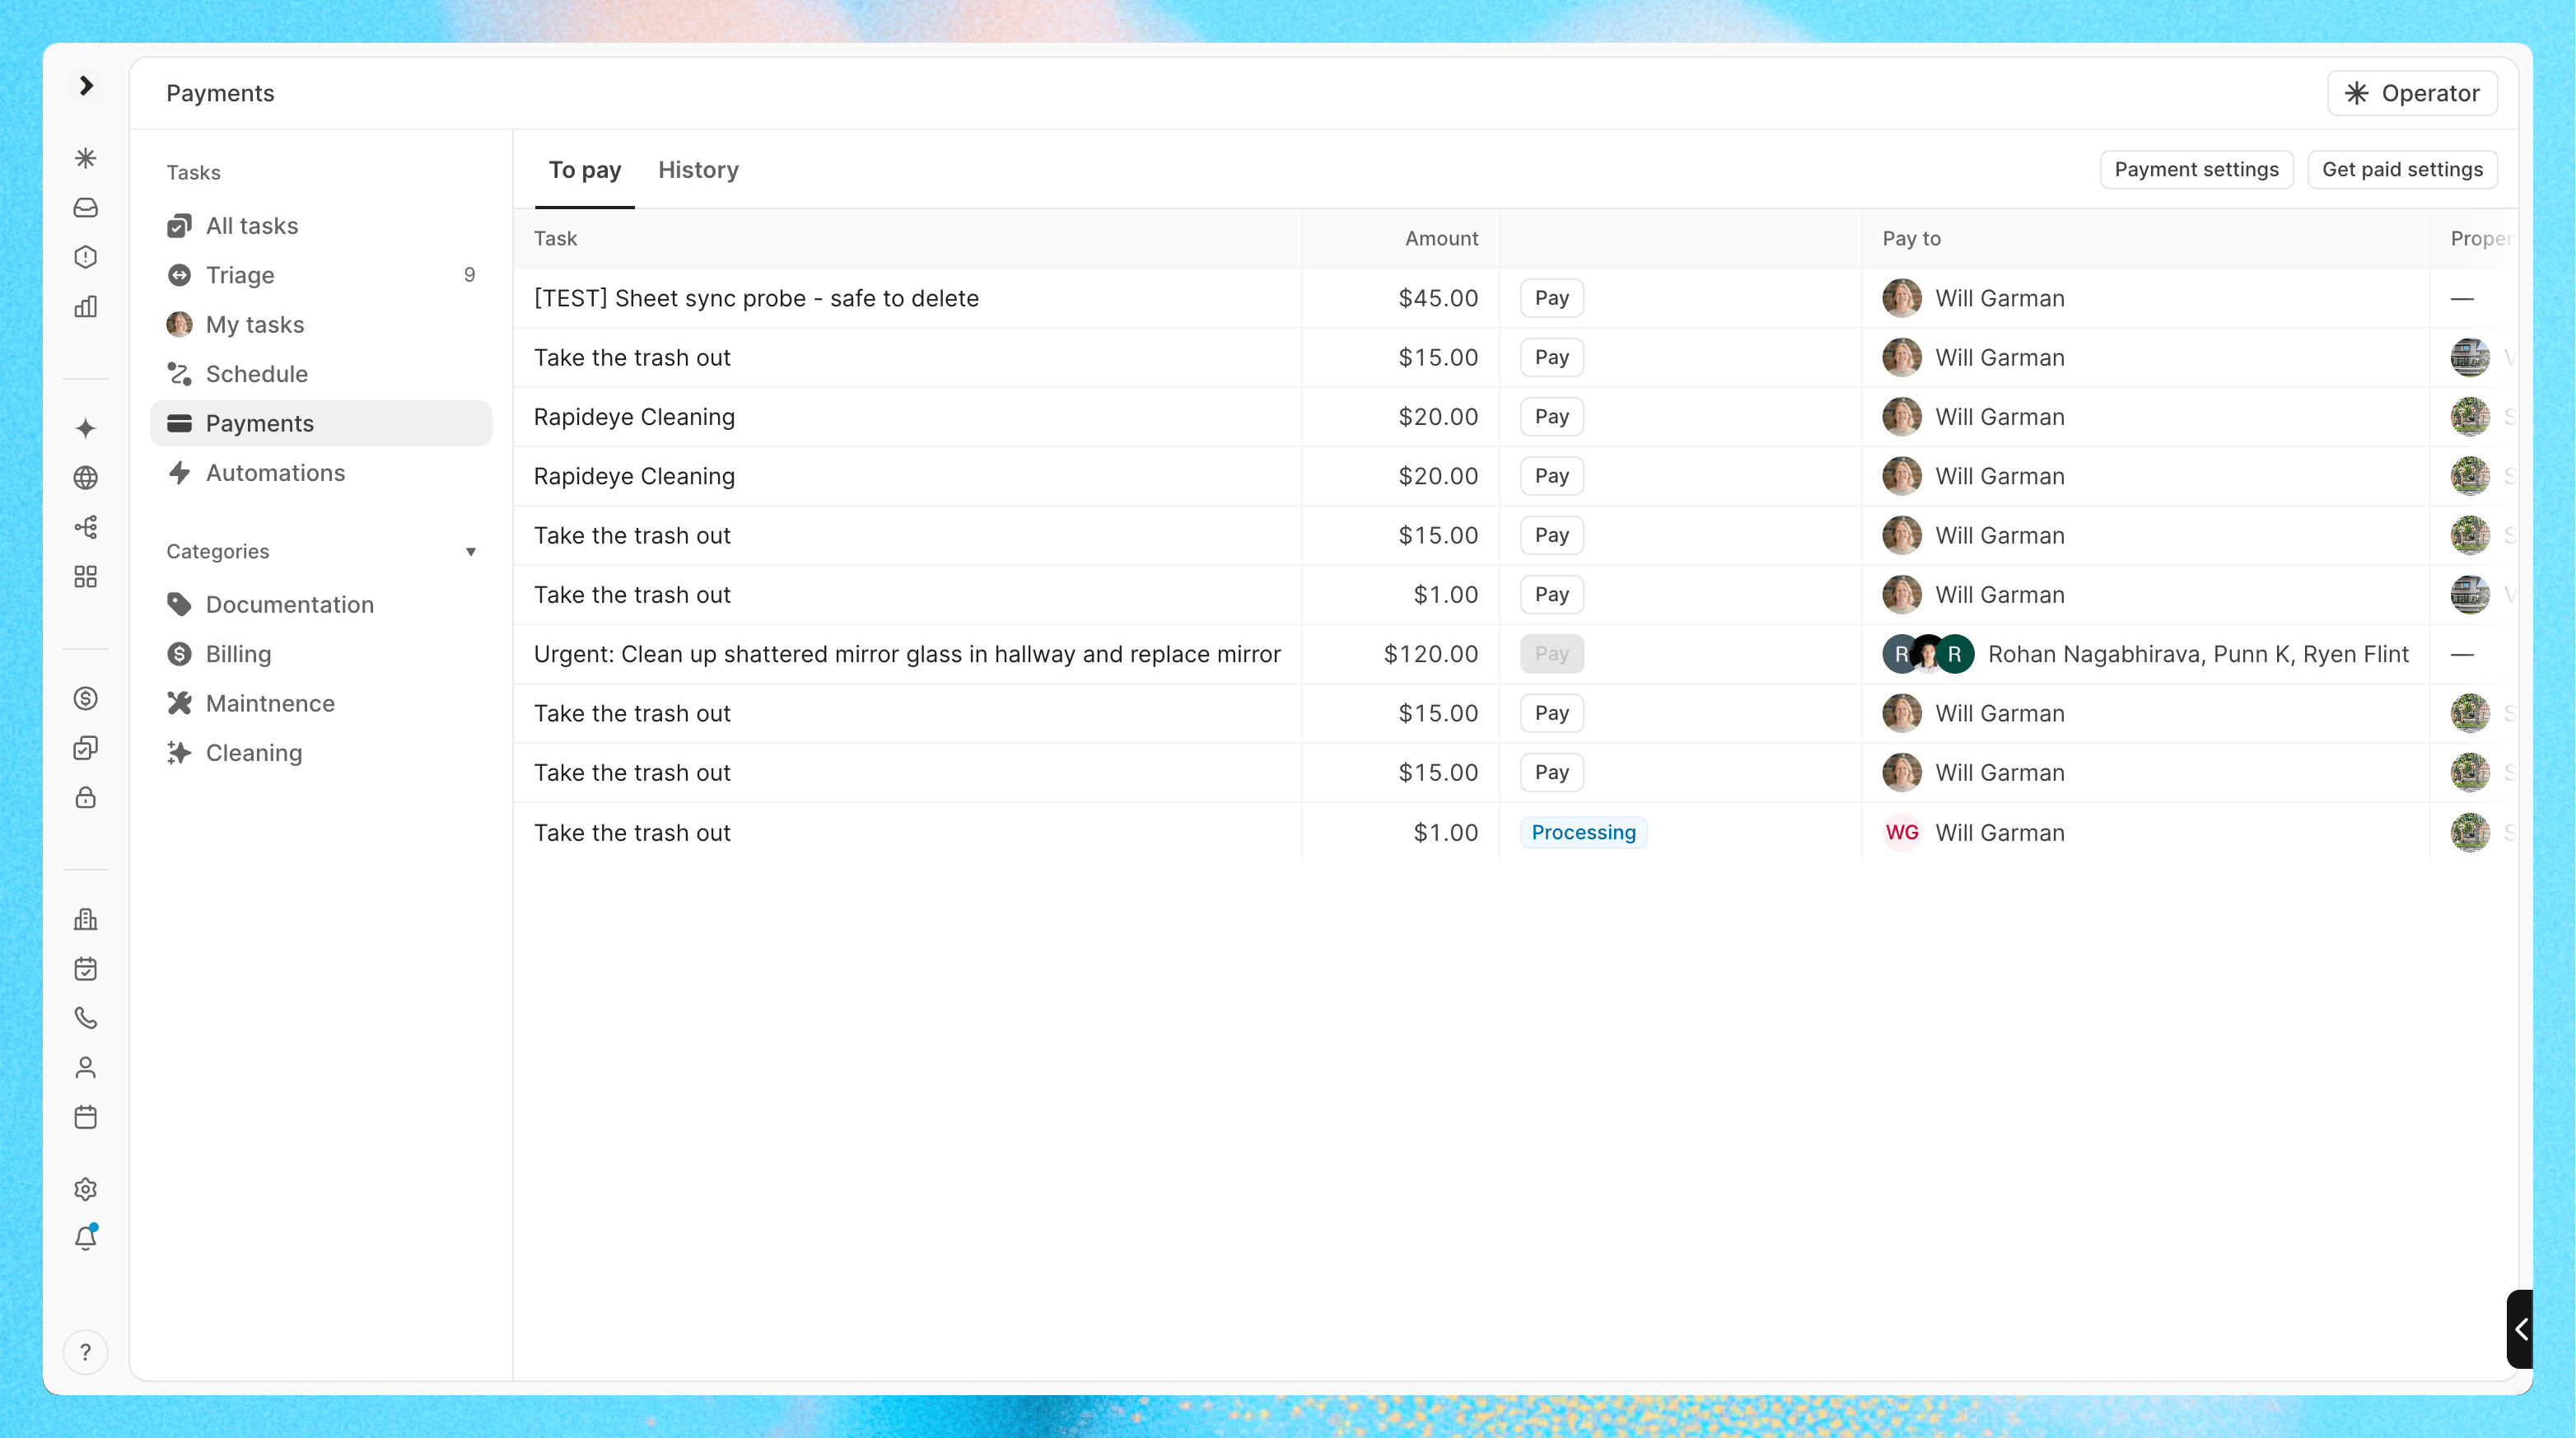
- A worker completes a task that has a total charge. It shows up in Payments > To pay
- Click Pay on the task. The confirmation shows who gets paid, each person’s share, the payment method, the fee and the total you’re charged
- Pick a saved payment method, or choose Bank account · enter details or Card · enter details and finish in Stripe
- Click Pay with the total, or Continue to Stripe when you enter new details
- The payment shows Processing, then Paid, and moves to History
Who gets paid
- Every assignee on the task is paid. The total is split equally between them
- Every assignee has to be a workspace member who has connected Stripe. Contacts can’t be paid until they become members
- If someone isn’t ready, Pay is unavailable and its tooltip says why, such as “Ana hasn’t connected Stripe yet.”
- The amount has to be between $0.50 and $999,999.99
Fees
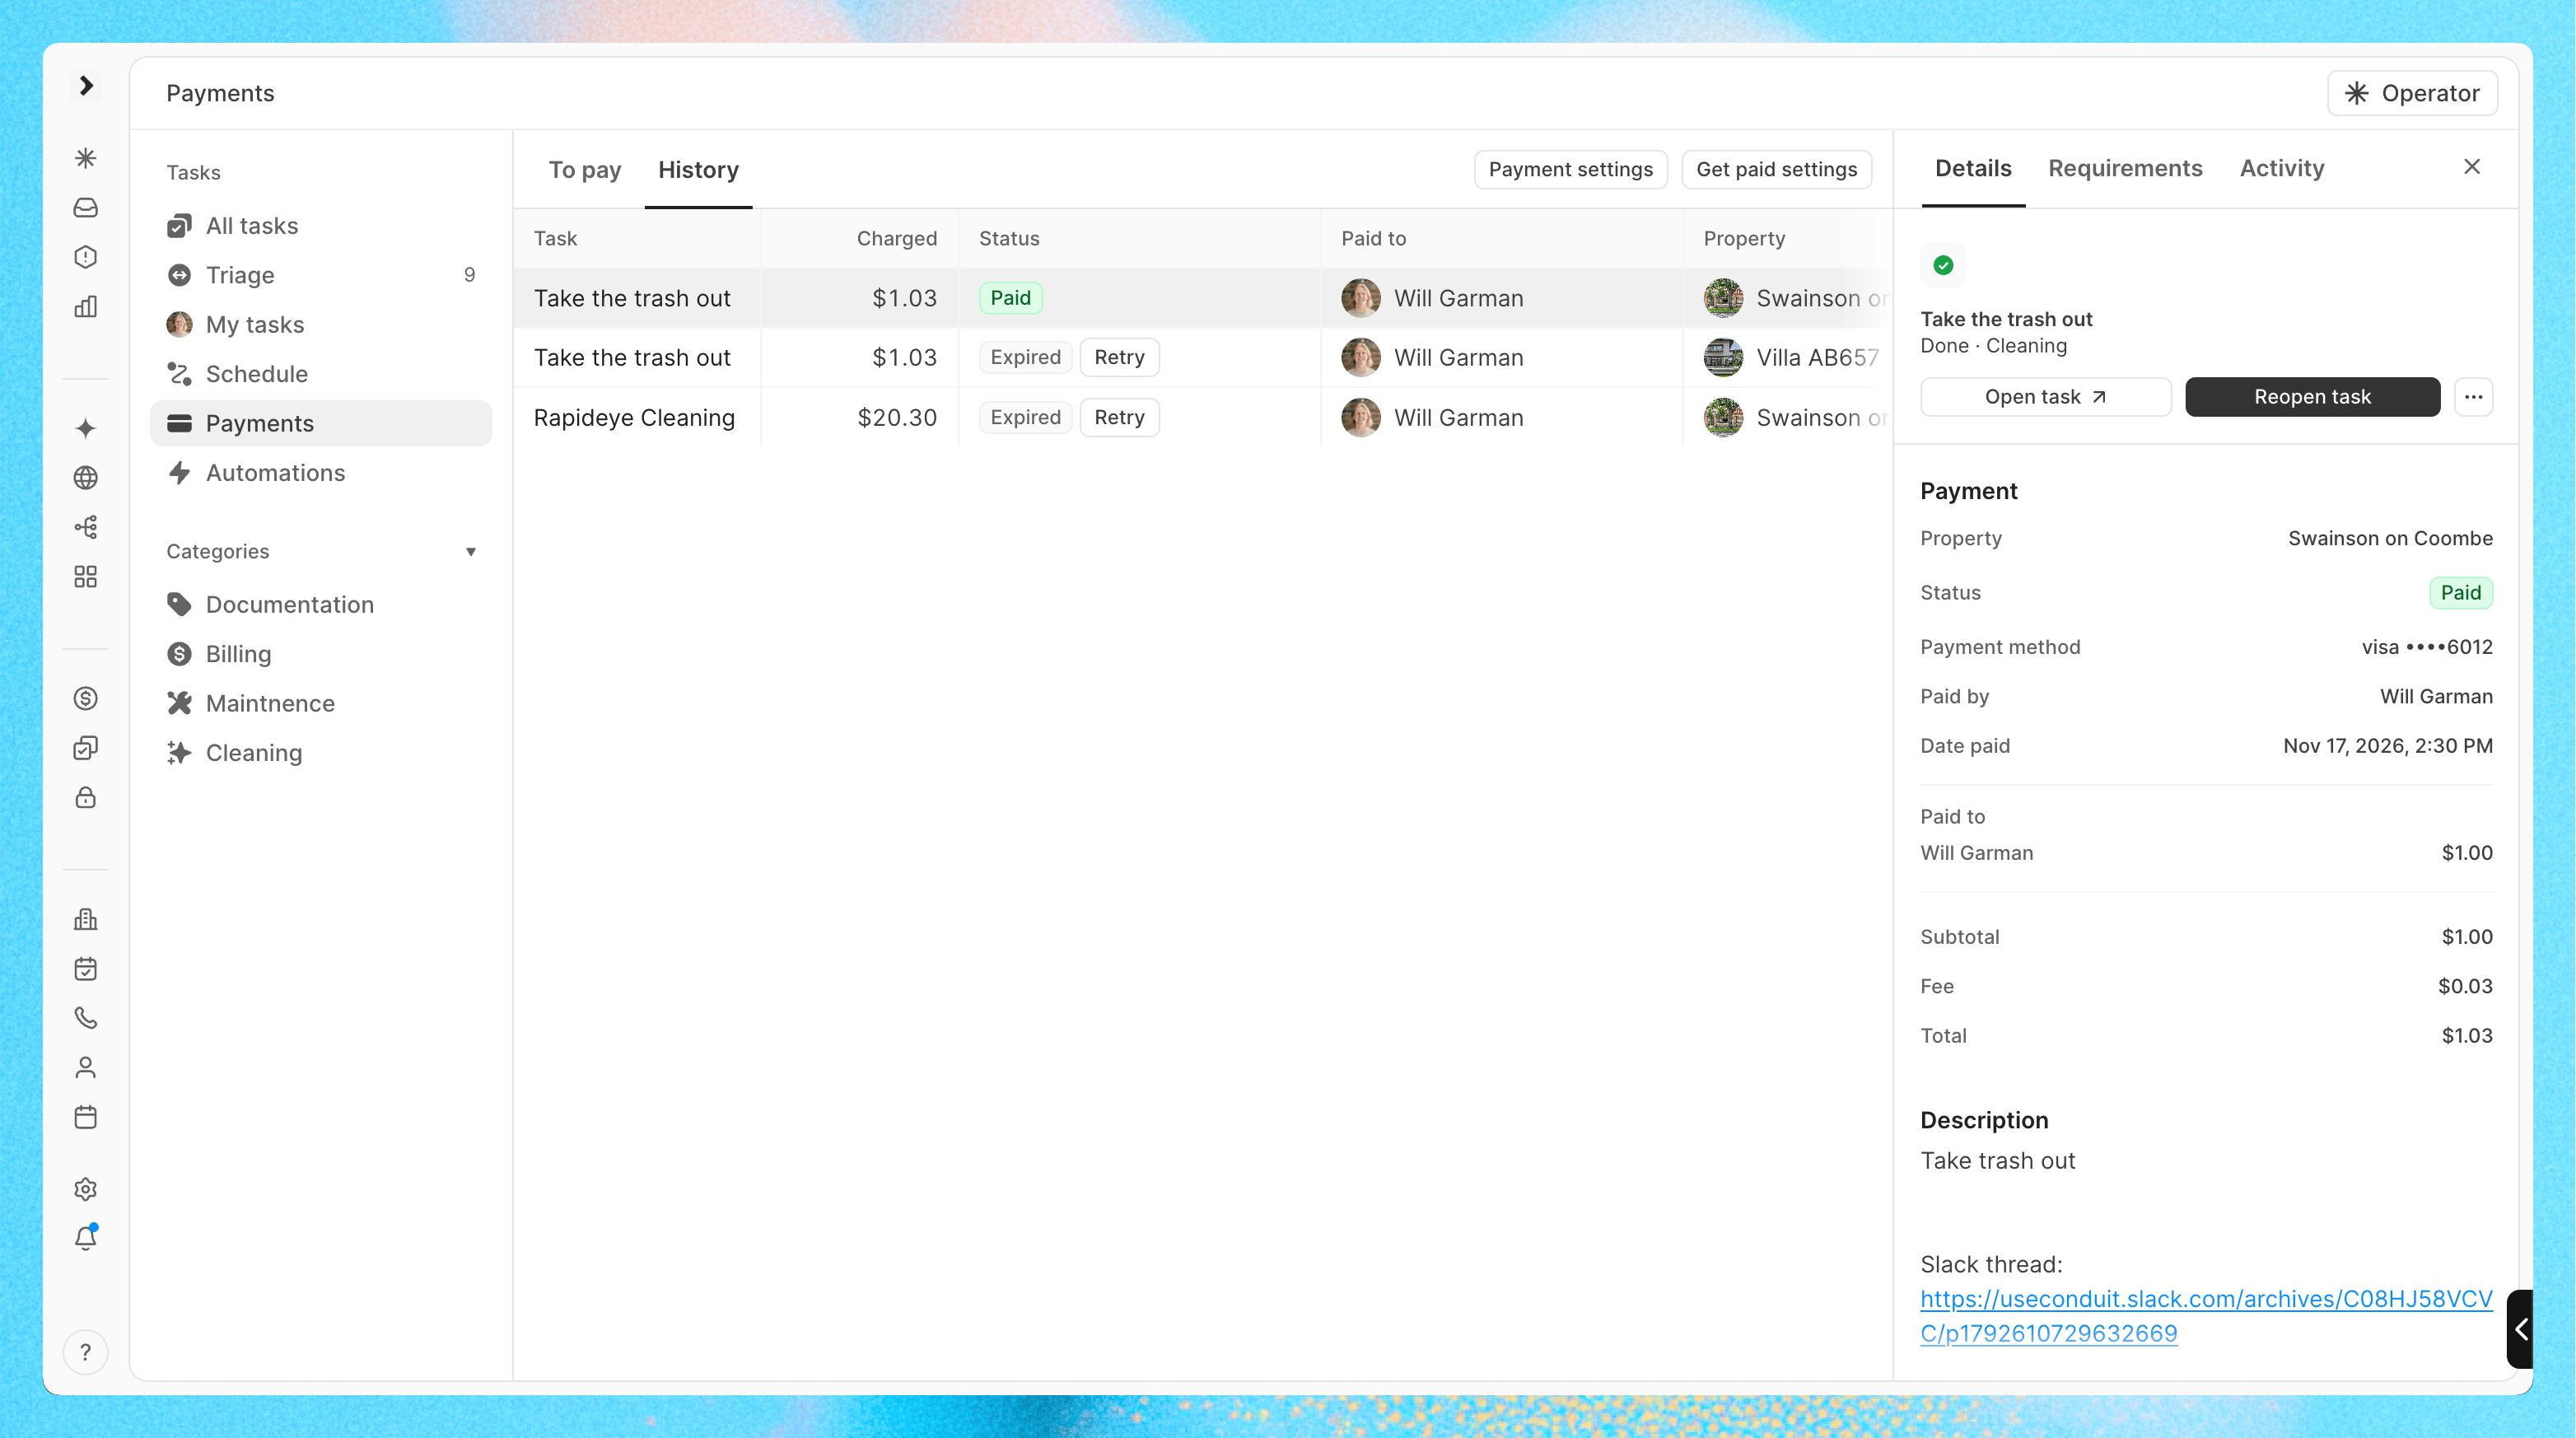
The fee is added on top of the task total, so workers get the full amount.Payment statuses
Click a row to see the task and its payment details: method, who paid, each person’s share, subtotal, fee, total and earlier attempts.
Company payment settings
Your company pays with a card or US bank account saved in Conduit. This is separate from the Stripe account your portals use to receive guest payments.- Go to Operations > Payments and click Payment settings
- Click Add payment method and finish the steps in Stripe
- Back in Conduit, click Refresh if the new method doesn’t show yet
- The first method is the Default. Use a method’s menu to Make default or Remove it
- Bank accounts may need verifying with small deposits first. Click Verify bank account to finish in Stripe. Until then, you can’t pay with that account
Autopay
Autopay pays tasks for you with the default payment method, fees included, when they move to a status you pick.- In Payment settings, turn on Autopay. You need a default payment method first
- Under Task status, pick the statuses that trigger a payment. You can choose Review or Completed statuses. Your Completed statuses, such as Done, are selected to start
- Autopay only pays tasks that move to those statuses after you turn it on
- Each task gets one automatic attempt. If it fails, click Retry in History
- A task that isn’t ready to pay, for example because a worker hasn’t connected Stripe, stays in To pay for you to pay by hand
- Autopay payments show Autopay as the payer
Workers: connect Stripe to get paid
Each worker connects their own Stripe account once. Share these steps with your team.- In Conduit, go to Settings > Get paid (under You)
- Click Connect Stripe
- Log in to Stripe, or create a Stripe account, and finish Stripe’s setup
- Back in Conduit, check that the status says Ready to receive payments
- The connection belongs to the worker, not the workspace. It works in every Conduit workspace they’re a member of
- Click the Stripe account on the Get paid page to see Payment history for every task payment they’ve received
- Disconnect, in the same menu, stops new payments until they reconnect. Payments already started still arrive